Securing your website with an SSL certificate is no longer optional. SSL encrypts communication between your users and your site, boosts SEO rankings, and builds trust. This guide simplifies the process of setting up an SSL certificate on Hestia Panel, a user-friendly web hosting control panel. Whether you’re a beginner or experienced in web management, this tutorial will walk you through each step with clear explanations and actionable insights.
What is an SSL Certificate?
SSL (Secure Sockets Layer) certificates are digital certificates that authenticate the identity of a website and encrypt data in transit. When users access a site secured with SSL, they see a padlock icon in the browser’s address bar. SSL ensures sensitive information, like login credentials and payment details, is protected from interception.
For Hestia Panel users, setting up SSL is straightforward and crucial for secure hosting.
Why use SSL certificates with Hestia Panel?
- Enhanced security: SSL safeguards your website and protects sensitive data.
- Improved trust: A secure site signals professionalism and credibility to users.
- SEO boost: Google prioritizes HTTPS-secured websites in its search rankings.
- Compliance: SSL helps meet security requirements, especially for eCommerce sites.
Prerequisites for setting up SSL on Hestia Panel
Before diving into the setup, ensure you have the following:
- Access to Hestia Panel – Ensure you have administrative credentials.
- Domain name – A registered domain is essential.
- SSL Certificate – Either self-signed, Let’s Encrypt, or purchased SSL certificates.
- Basic command line knowledge – Needed for advanced configurations.
- Web server configured – Nginx, Apache, or both.
Step-by-Step guide to set up SSL on Hestia Panel
Accessing Hestia Panel
- Log in to your Hestia Panel by navigating to
https://your-server-ip:8083. - Enter your username and password.

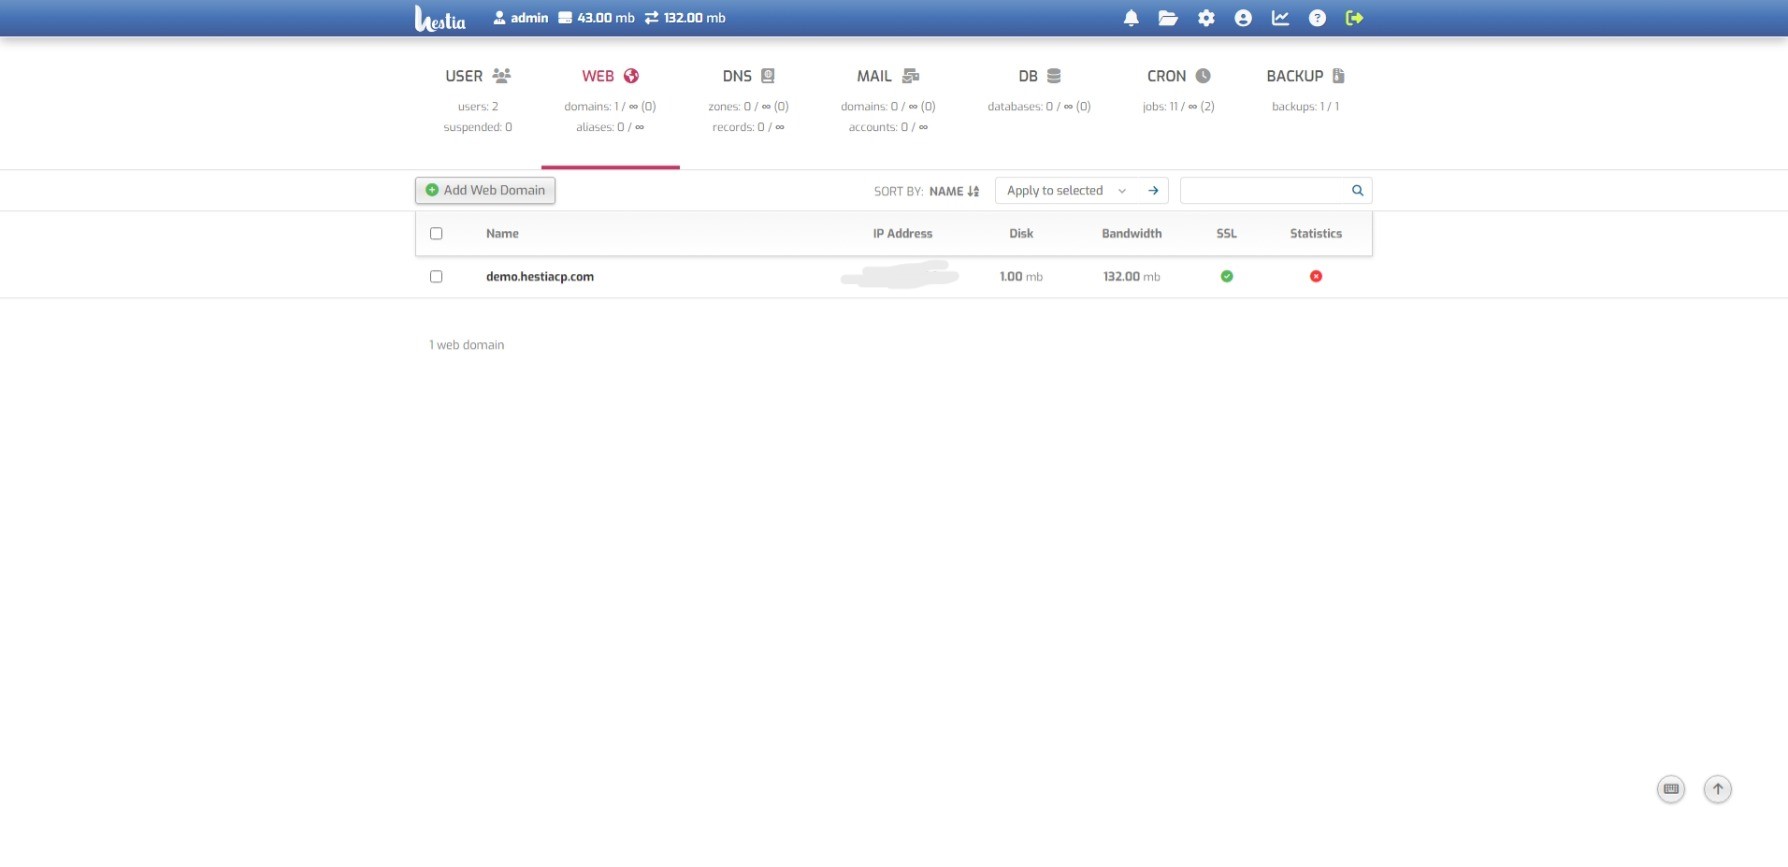
Navigating to the domain management section
- From the Hestia Dashboard, click on the “Web” tab in the top menu.
- Locate the domain you want to secure and click “Edit”.
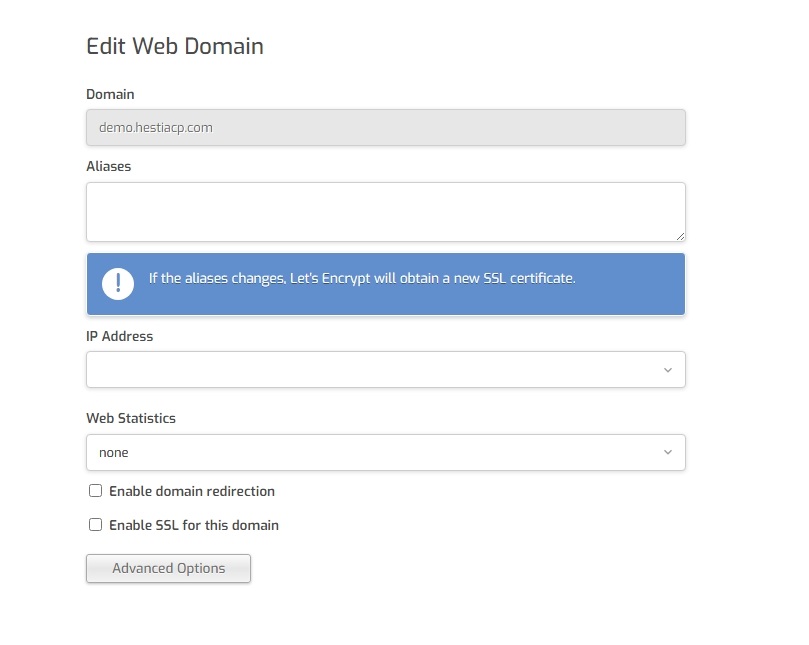
Enabling SSL for your domain
- In the domain settings, check the box labeled “Enable SSL Support”.
- For a free SSL certificate, check “Enable Let’s Encrypt Support”.
Using Let’s Encrypt for SSL
- Ensure your domain’s DNS settings point to your server. Verify the A and CNAME records.
- Click Save to initiate the Let’s Encrypt SSL issuance process.
- Wait for the green success notification. If you encounter errors, verify your DNS settings and domain connectivity.
Installing a custom SSL certificate
If you’ve purchased an SSL certificate or generated one using another service, follow these steps:
- Upload certificate files:
- Locate your .crt (Certificate) and .key (Private Key) files.
- Copy the content of the
.crtfile into the SSL Certificate field. - Copy the content of the
.keyfile into the SSL Key field.
- Upload intermediate certificate (Optional):
- If provided, paste the intermediate certificate in the SSL Certificate Authority / Chain field.
- Click Save to apply the certificate.

Verifying SSL Installation
After setting up the SSL certificate, confirm the installation:
- Open your browser and visit your domain using
https://. - Look for the padlock icon in the browser’s address bar.
- Use online tools like SSL Labs to validate the SSL setup.

Configuring HSTS (Optional)
HTTP Strict Transport Security (HSTS) enforces HTTPS connections and improves security.
- check “Enable HTTP Strict Transport Security (HSTS)”.
- Save the settings and reload your web server.

Troubleshooting Common SSL Issues
DNS Configuration Errors
Ensure the DNS records for your domain are correctly configured to point to your server.
Let’s Encrypt Issuance Fails
- Verify that port 80 and 443 are open in your firewall.
- Check for conflicting SSL settings in your web server.
Browser Warnings
If browsers show warnings despite installing SSL, double-check the certificate chain and expiration date.
Best Practices for SSL Management on Hestia Panel
- Renew Certificates Regularly: Let’s Encrypt certificates auto-renew, but monitor expiration dates for manual setups.
- Enable Redirection: Force HTTP to HTTPS redirection for a consistent secure browsing experience.
- Monitor Security Logs: Regularly check logs for unauthorized access attempts or SSL errors.
FAQs
How does Let’s Encrypt compare to paid SSL certificates?
Let’s Encrypt is free and ideal for basic websites, while paid SSL certificates offer advanced features like extended validation and warranty coverage.
Can I use SSL for subdomains on Hestia Panel?
Yes, you can set up wildcard certificates or issue separate certificates for each subdomain.
What if my SSL certificate isn’t working?
Check your DNS configuration, server settings, and firewall rules to ensure connectivity.
How often should I renew my SSL certificate?
Let’s Encrypt certificates renew every 90 days automatically. For manual certificates, renew as per the provider’s timeline.
Is SSL mandatory for SEO?
While not mandatory, SSL is a ranking factor in Google’s algorithm, making it essential for competitive SEO.
Can I switch from Let’s Encrypt to a paid SSL certificate later?
Absolutely! You can replace the Let’s Encrypt certificate with a custom one at any time in Hestia Panel.
Conclusion
Securing your website with an SSL certificate on Hestia Panel is essential for modern web hosting. This guide outlined both automated and manual processes, ensuring that users of all experience levels can successfully implement SSL. By following these steps, you’ll enhance your site’s security, boost SEO, and build trust with visitors.