This guide provides step-by-step instructions for manually configuring email in Microsoft Outlook 2010, 2013, 2016 and Outlook 2019.
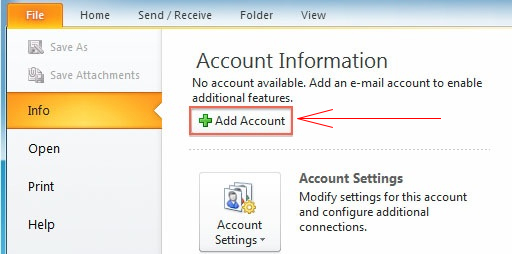
1 – Setup Outlook 2010
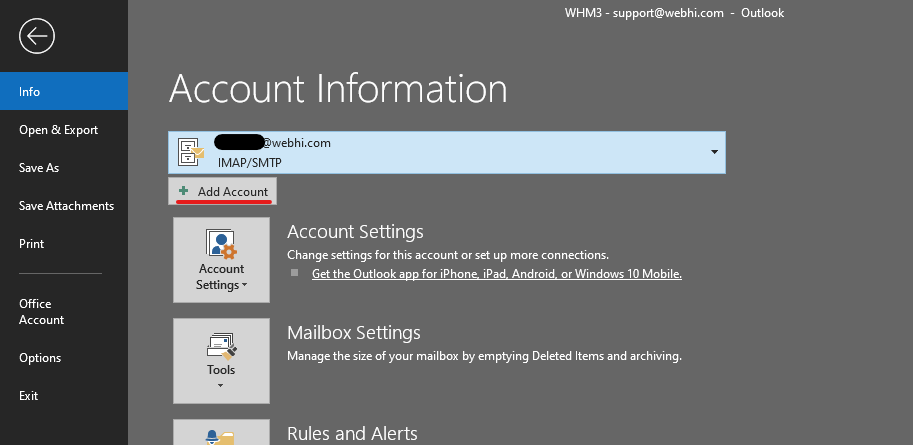
- Select the File menu.
- Select Info.
- Click the Add Account button.
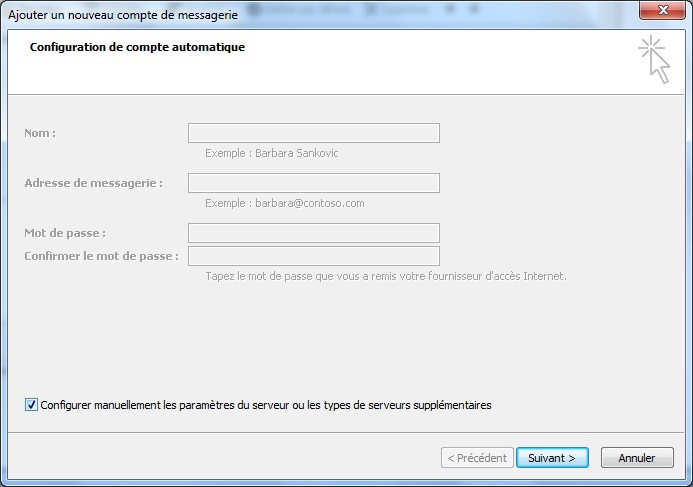
Choose Manually configure server settings and Click Next.
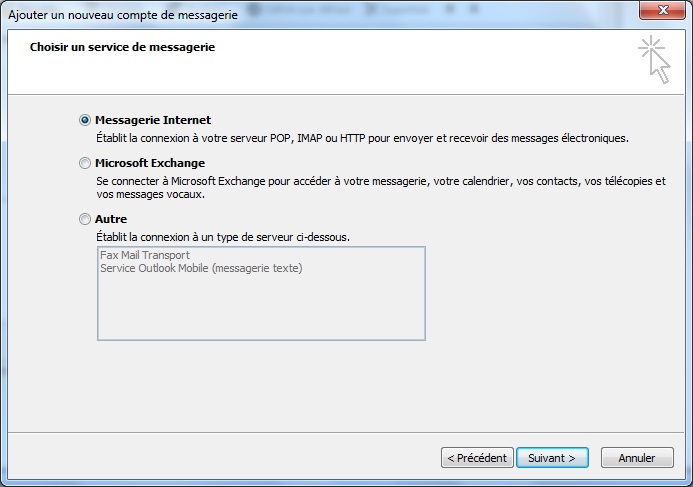
Now we choose Internet E-Mail and Click Next
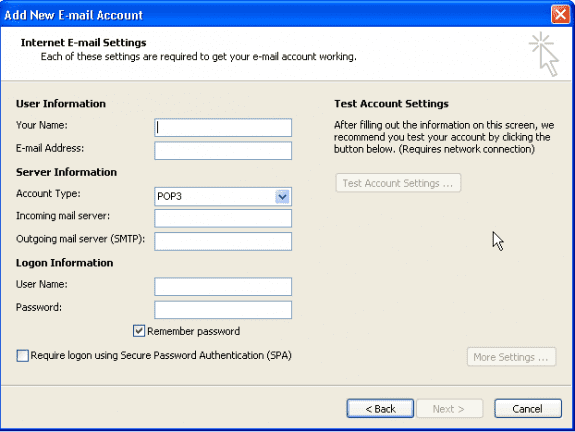
Use the information below to help fill in the settings for your new email account.
| Your Name | Insert your full name here. This name will appear on all your sent email. |
|---|---|
| Email Address | Put in your full email address, for example [email protected] |
| Account Type | Select POP3 if you want the emails to be downloaded to Outlook. Select IMAP if you want the emails to remain on your hosting server. |
|---|---|
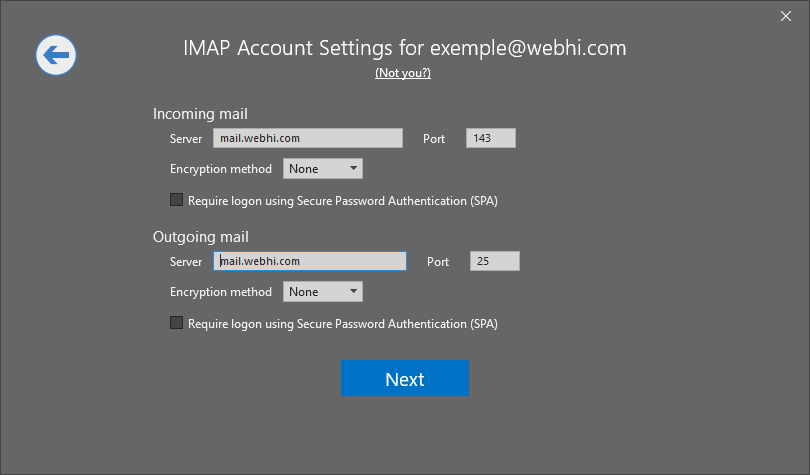
| Incoming Mail Server | the incoming mail server is something like this mail.example.com. |
| Outgoing Mail Server | This will be the same as your Incoming Mail Server, mail.example.com. |
| Username | This will be your full email address. For example, [email protected] |
|---|---|
| Password | This is the password for the email account you listed above and not the password for your cPanel. |
Next click on the More Settings… button and make the following modifications:
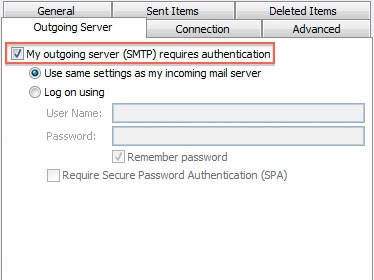
| Outgoing Server Tab | On the Outgoing Server Tab, make sure that “My outgoing server requires authentication” is checked, as well as “Use same settings as my incoming mail server“ |
|---|---|
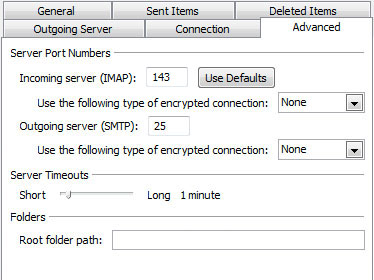
| Advanced Tab | By default, you do not need to change anything here, however, if you are having trouble sending email then you can change the port settings here. |
While on the E-mail Accounts screen, click the Test Account Settings button
This will both check your settings and send a test email to yourself to confirm that everything is working. If you receive any errors, please check your configuration.
And click on Next to save settings.
2 – Setup Outlook 2013 / 2016 / 2019 / 2022
- Select the File menu.
- Select Info.
- Click the Add Account button.
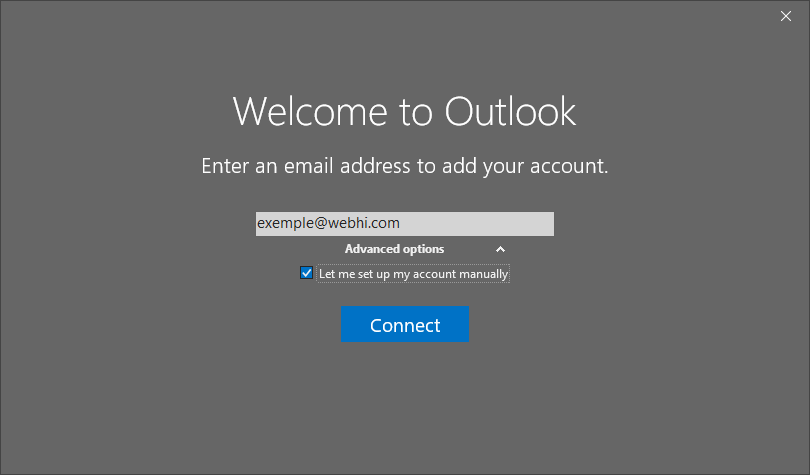
Choose Let me set up my account manually and Click Next.
Choose account Type:
- IMAP : if you want the emails to remain on your hosting server.
- POP : if you want the emails to be downloaded to Outlook.
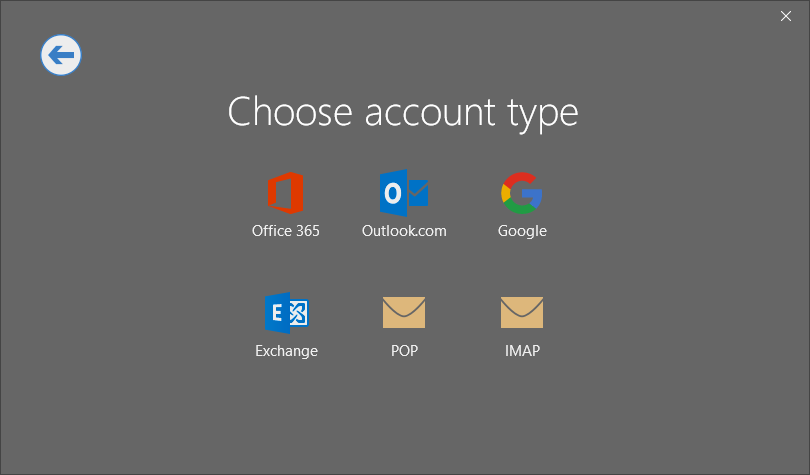
I Selected IMAP :
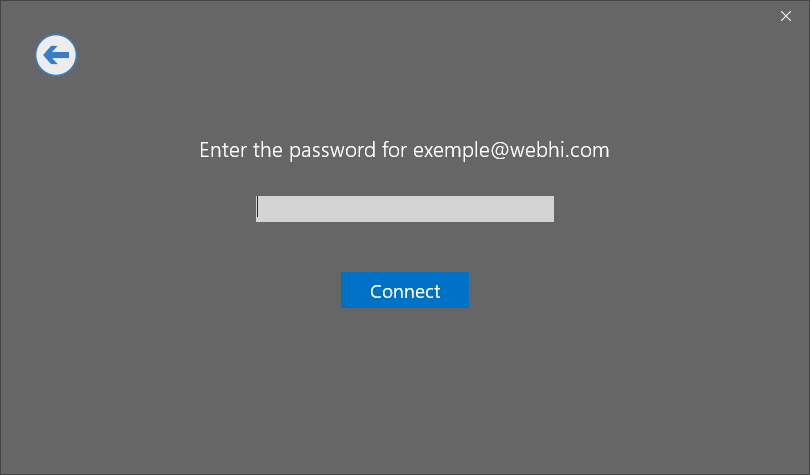
Finally, type your password and Click Connect.
Conclusion
In this article, we showed you how to Configure Outlook 2010 / 2013 and newer Manually.